

Can Projection Screen Paints Be Use for an Acoustically Transparent Screen?
Projection screen paint is a key component in creating immersive visual experiences in movie theatres and home theatre setups, but did you know these paints can also be used for acoustically transparent screen? Understanding the science behind these paints is... Continue reading→
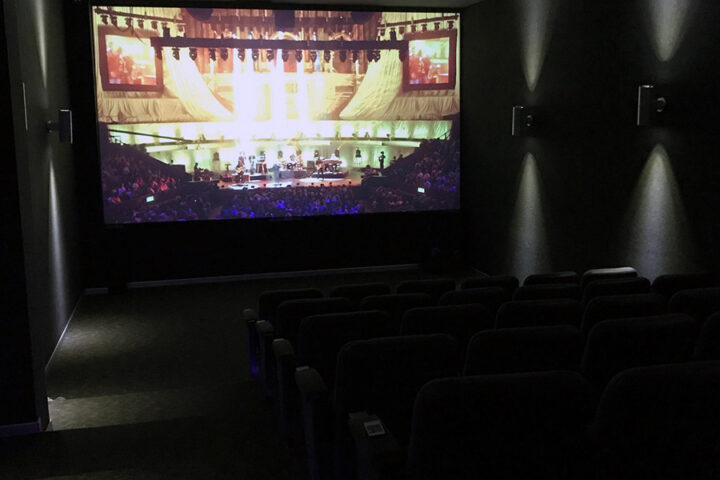
Revolutionising Movie Theatres with Cinema Screen Paint
Cinemas and movie theatres have always aimed to provide a captivating and immersive experience for moviegoers. While advanced projection systems and surround sound have enhanced the audiovisual experience, the quality of the projected image itself plays a crucial role. In... Continue reading→

Which Is The Strongest Magnetic Paint?
So you’re adding magnetic functionality to your surfaces. That’s great. Magnetic surfaces are a great way to project plan, create noticeboards and carry out lessons. You can reinvent the way you work and learn. But, how do you create your... Continue reading→

How To Turn Your Wall Into A Magnetic Whiteboard
One of the things we hear a lot from our customers is, how limited in size magnetic panels and whiteboards can be. How are you supposed to work efficiently as a team if only one person can use them at the one time? This isn’t very effective. Continue reading→

Magnetic Chalkboard Paint: What You Need To Know
Think chalkboards are boring and belong in the past? Why not upgrade with some magnetic chalkboard paint? Continue reading→

Dry Erase Paint: What You Need To Know Before You Buy Whiteboard Paint
So you want to buy dry erase paint and add functionality to your office or classroom walls. That’s a great choice.With a dry erase paint, like our Smart Whiteboard Paint, you can transform any smooth surface into a writable area in any size you choose. Continue reading→

Looking For Alternatives To Chalkboards
Are you looking to update your office or classroom with a writable surface? Many offices are now abandoning old outdated whiteboards and chalk boards and instead choosing to add functional surfaces to their spaces. Continue reading→

Whiteboard Paint Vs Chalkboard Paint – Choosing the Right One
Deciding to modify your workspace into an innovative working and learning environment is the first step. The second is the decision of whiteboard paint vs chalkboard paint. Continue reading→

Ways Whiteboard Walls Are Different To Whiteboards
So you want to make your very own whiteboard surface in your office or learning space, but how do you do it? Do you choose a traditional whiteboard or opt for whiteboard walls instead? Continue reading→
